What is the penetrant testing (PT)?
Penetrant testing (PT) is a non-destructive testing (NDT) method that is used to detect material defects that are open to the surface. This method is based on the capillary-active effect of liquids (the penetrants) and is particularly suitable for detecting cracks, pores and other irregularities that are open to the surface of a workpiece.
Areas of application
Penetrant testing is used particularly frequently in the metalworking industry, in the automotive and aerospace sectors for testing safety-relevant components (e.g. castings, forgings, weld seams). In the construction, power plant and plant engineering sectors, tests on steel structures, pressure vessels, pipes and fittings ensure safety.
Color contrast penetrant testing, i.e. penetrant testing in daylight with red dye penetrants, is also known colloquially as red-white testing. It is a classic method of non-destructive material testing. It therefore enables testing without affecting the specimen itself.
In addition to PT (penetrant testing), LPI (liquid penetrant inspection) or FPI (fluorescent penetrant inspection) are common abbreviations, and internationally used.
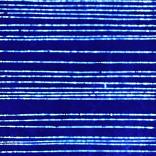
Fluorescent penetrants
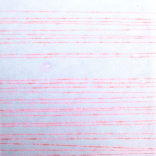
Color contrast penetrants
Basics and function of penetrant testing
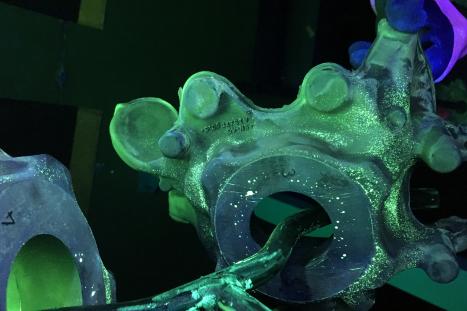
In addition to fluorescent penetrant testing with the aid of UV lamps, penetrant testing can also be carried out in daylight. This is referred to as color contrast penetrant testing, as penetrants with a red dye are usually used. In this case, the application of a developer is essential in order to achieve sufficient contrast in addition to display magnification. This is why dye penetrant testing under daylight conditions is also known colloquially as "red-white testing".
Penetrant testing utilizes the capillary-active, creeping effect of liquids (the penetrants). A special penetrant is applied to the cleaned surface of the workpiece to be tested. As the penetrant is intended to penetrate existing surface defects such as cracks, pores or other irregularities, the pre-treatment of the surface is of particular importance.
After a certain penetration time, which varies depending on the type of penetrant and the specimen to be tested, the excess penetrant is removed from the surface under defined conditions. A developer can then be applied, which draws out the penetrant remaining in the defects from surface irregularities and thus makes them visible.
Advantages of penetrant testing
- Can be used for a wide range of materials
- Direct recognizability of the defect location
- Easy to use without complex equipment
- Even very large or complex shaped components can be inspected
The process of penetrant testing
The procedure described here for carrying out the penetrant test corresponds to the specifications of DIN EN ISO 3452-1. For a reliable test process and correct results, the following are required
- precise adherence to the process steps
- use of suitable accessories
- use of an approved penetrant product family
In addition, the test must be carried out by test personnel qualified e.g. acc. to DIN EN ISO 9712. This is the only way to ensure that the requirements above are met and that the results are interpreted correctly.
An approved product family is a combination of products tested in accordance with DIN EN ISO 3452-2. It consists of penetrant, penetrant remover and developer.
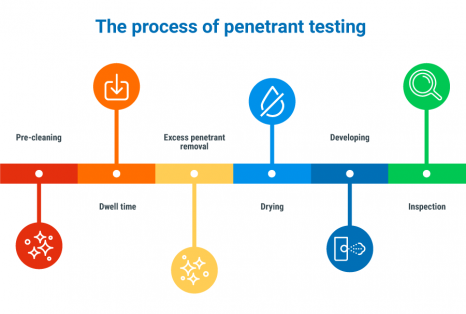
Process steps of the penetrant testing

1. Precleaning
Contaminants such as scale, rust, oil, grease, paint and water shall be removed if necessary using mechanical or chemical methods, or a combination of these. Precleaning shall ensure that the test surface is free from residues and that it allows the penetrant to enter any discontinuity.

2. Application of the penetrant
The penetrant can be applied to the part to be tested by spraying, brushing, flooding, dipping or immersion. The penetrant shall remain on the test surface throughout the entire penetration time.

3. Penetration time
The appropriate penetration time depends on the properties of the penetrant, the application temperature, the material of the part to be tested and the discontinuities to be detected. It is usually between 5 – 60 minutes.

4. Excess penetrant removal
The excess penetrant is removed from the test surface with water or approved cleaner. The excess penetrant removal shall be such that penetrant remains in the discontinuities. Control under UV light (≥ 100 μW/cm² und < 100 lx) respectively daylight or white light (≥ 350 lx).

5. Developing
The developer shall be maintained in a uniform condition during use and shall be evenly applied to the test surface. The development times should usually be between 10 - 30 minutes. It begins immediately after application, when dry developer is applied and immediately after drying of the developer layer, when a wet developer is applied.

6. Inspection
Indications are produced during the developing. Inspection shall be carried out when the development time has elapsed. The indications become visible when using fluorescent penetrants under UV light (≥ 1000 μW/cm² und < 20 lx) or when color contrast penetrants are used under daylight / white light (≥ 500 lx). Evaluation and documentation may be done by any adequate method.
Standards and specifications
The procedure and practical application of penetrant testing is described and defined in various standards and specifications. This ensures that a reliable and consistent result is achieved with the tests. Standardization also ensures that tests produce comparable results worldwide.
The following standards describe the procedure, practical implementation, requirements for the test equipment, viewing conditions or personnel qualification for penetrant testing.
- DIN EN ISO 3452-1, 3452-2, 3452-3
- ASTM E165, E1417
- AMS 2644
- ASME V Art. 6
- EN 3059
- DIN EN ISO 9712
In Germany, the German Society for Non-Destructive Testing (DGZfP) also plays a central role in the dissemination and training of this and other test methods. In addition, there are numerous other, often national or even company-internal specifications and regulations, e.g. on workpiece quality classes.
PFINDER is a member of the following standards committees and is also involved in various process-related technical committees:
National
NA 062-08-20 AA
„Zersörungsfreie Prüfung, Obleuteausschuss“, (Non destructive testing, chaipersons committee)
NA 062-08-24 AA
„Elektrische und magentische Prüfverfahren“, (Electrical and magetic test
methods)
NA 062-08-25 AA
„Oberflächenverfahren“, (Surface methods)
International
CEN/TC 138/WG 4 „Penetrant testing”
CEN/TC 138/WG 5 “Magnetic particle testing”
ISO/TC 135/SC 2 “Surface Methods”
ISO/TC 135/SC4
“Eddy current testing” (cares as well about MT)
Limitations of penetrant testing
A wide range of materials can be inspected using penetrant testing. The entire process takes some time for each test part.
In the case of very porous surfaces (e.g. ceramics), excess penetrant removal can be time-consuming and the evaluation may be impossible due to a lack of contrast. Plastics in particular must also be checked for material compatibility with the penetrant product family used before testing. The size of a indication does not allow any interpretation about the size or volume of a possible inhomogenity.
Great importance must be attached to pre-cleaning the surface to be tested, as any residue can interfere with the penetration process and distort the results. The ambient conditions (e.g. temperature and humidity) must also be taken into account.
It is therefore important to have the penetrant testing process planned and carried out by qualified test personnel. The correct test methods, equipment and consumables must be selected and the results interpreted correctly.


